📢"Cloud Infrastructure Setup Guide with VPC, Subnets, and Autoscaling"
AWS Public☁️ and Private subnet Architecture using a project♾️.

Concepts to be known:
What is VPC and why is it important?
A Virtual Private Cloud (VPC) is a virtual network in cloud computing that provides isolated resources and security controls. It's important for secure, scalable, and efficient cloud infrastructure management.
Difference between Public subnet and Private subnet?
A public subnet in a VPC has a route to the internet, enabling resources within it to access and be accessed publicly. A private subnet lacks direct internet access, enhancing security by restricting inbound traffic and facilitating communication through a NAT gateway or instance.
What are Availability Zones?
Availability Zones (AZs) are distinct locations within a region, designed to be isolated from failures in other zones. They provide redundancy and fault tolerance for services and data in cloud computing, enhancing reliability and resilience.
What is a Autoscaling Group?
An Autoscaling Group is a feature provided by cloud computing platforms that automatically adjusts the number of instances in a group based on demand. It ensures optimal performance, cost efficiency, and fault tolerance by scaling resources up or down dynamically.
What is a Load Balancer?
A Load Balancer evenly distributes incoming network traffic across multiple servers to ensure efficient resource utilization, prevent overload, and enhance reliability. It enhances scalability and fault tolerance of web applications by directing requests to healthy servers.
What is Target Group?
A Target Group is a logical grouping of resources, typically instances or IP addresses, that a load balancer routes requests to based on configured criteria such as port, protocol, and health checks. It helps manage and balance incoming traffic across multiple targets efficiently.
What is Jump Server or Bastion Host ,purpose of using it?
A Jump Server or Bastion Host is a secure gateway for administrators to access private network resources remotely. It reduces attack risks and centralizes access control for enhanced security management.
What is NAT gateway & Why is it important?
A NAT gateway enables private subnet instances to access the internet while maintaining privacy. It's vital for outbound connectivity, securing internal IPs, and controlling internet access for private resources in VPCs.
Overview of the Project:
High Level Overview:

Explanation:
VPC has public and private subnets in two availability zones.
Each public subnet has a load balancer and a NAT Gateway.
The servers run in private subnets are launched and terminated using a Auto-Scaling group and receive the traffic from the load-balancer.
The server can connect to internet using NAT-Gateway.
Steps to Reproduce:
Creation of VPC:
1.Go to VPC >Click on Create VPC (choose VPC and More) and check Availability-Zones(AZ) -2, No of public / private subnets -2,choose NAT Gateways - 1 per AZ, VPC endpoint-None >Create.
2.You should check the network preview which should look like this:
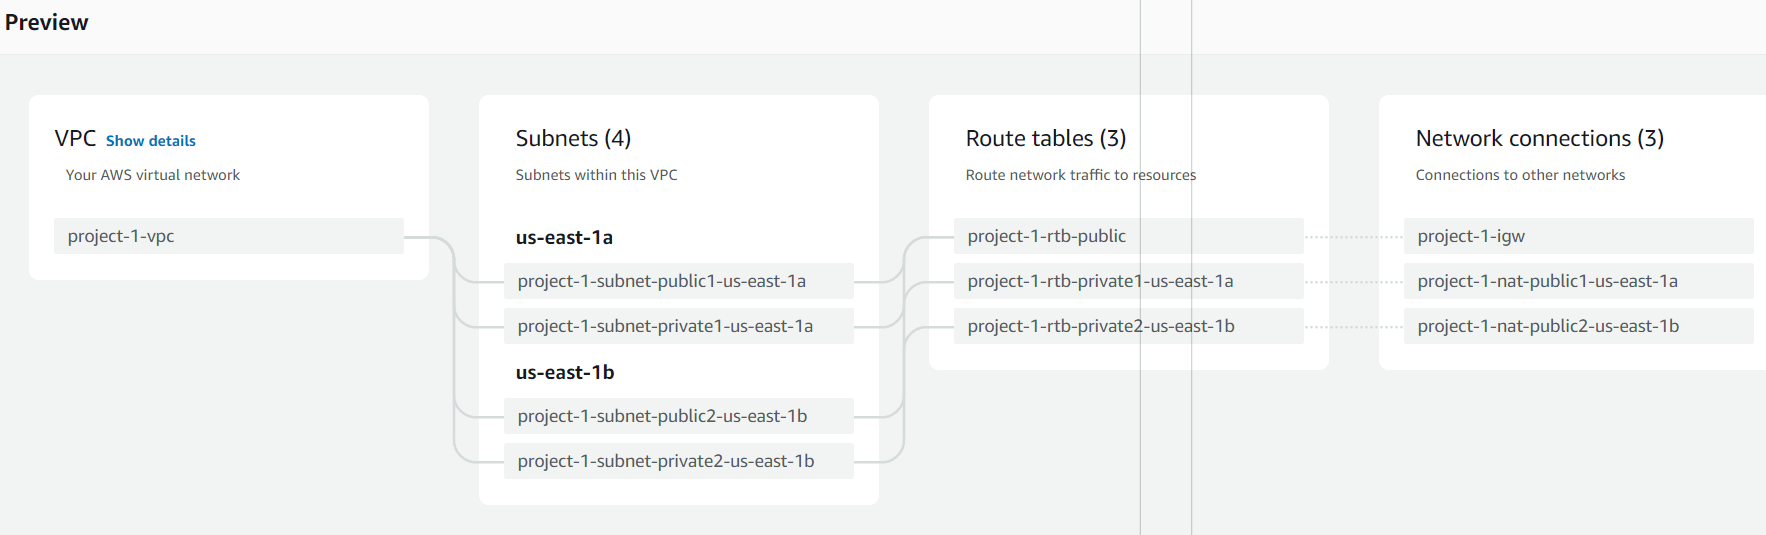
3.It will be creating a lot of resources for you,(It will take 5 min to activate the NAT Gateway), so be patient and then VPC will be created.
Create EC2 Instances using Auto-Scaling Groups:
4.Then go to Ec2 , Create a Auto Scaling Group, click on Auto-Scaling Groups> click on Create Launch-Template, give it name, and choose other things from below box
| OS Type | Ubuntu |
| Instance Type | t2.micro |
| keypair | Your wish |
And then in Network Settings > choose create security group and give it a name and choose the VPC created earlier and then add security group rule choose "SSH" and source type as "Anywhere" and then create another security rule Type - "Custom-TCP" and choose Port -Range : 8000 and source-type as "Anywhere".
5.Auto-Scaling-Groups - They usually maintains EC2 Servers.
6.Now again go the create Auto-Scaling-Group and choose the auto-scaling Group created earlier(test -in my case) and click on next\> choose your VPC and a AZ and Subnet a public subnet\> Next, You can create it later (Load -Balancers) and click on Next.
7.Choose Desired-Capacity as 2 that is (min -1 , max -2) and then click on Next>Next> Tags are optional (click on Next)> Create a Auto-Scaling-Group.
8.It will take some time to activate.

9.Check whether the Auto-Scaling-Group created EC2 Instances in Availability-Zones.
10.Then go to the EC2 Dashboard , it will create Instances in two Availability Zones(They wont have public ip Address)

11.Go to one instance and check , you wont have Public-ip.

12.Now , you need to setup Load-Balancer, but before that, we need setup Bastion Host or Jump-Server.
13.Your EC2 Instances wont have Public-ip address ,now actually Jump-host comes into picture which is responsible and acts as bridge between Public & Private Subnet.
Creation of JUMP-SERVER:
Creating Jump-Host, Just Launch a Normal Ec2 -Instance(while creating choose the VPC Created earlier and auto-assign-ip-address = enable) and create a Instance.
15**.Now , you need to copy the .pem file**(Key Pair details) details which is present in your system to Jump server created earlier.
scp -i <location of ur pem file> <location of ur pem file> ubuntu@<ipof Jump-server>16.login to bastion-host using the following command
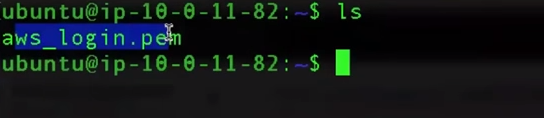
ssh -i <location of your pem file> ubuntu@<ip of ur machine>17.Now, just do ls , you should able to the .pem file here.
18.Then copy the private-ip of one machine created earlier,
and follow the below command.
ssh -i <location of your pem file> ubuntu@<private-ip of ur machine>19.Now, you should be able to login into the machine(private instance)
20.Create a simple html page.
      <!Doctype html>
      <html>
      <body>
      <h1>My First AWS Project  to demostarte apps in private subnet</h1>
      </body>
      </html>
21.And save the file and run the below command
python3 -m http.server 800022.My application is running in one of instance.

Creating Load Balancers and adding Target Group to it(in-our case EC2-Instance)
23.Go to EC2 , Load-Balancers, (Application load Balancer)
give it a name it should be internet facing, Provide the VPC created earlier and select public subnet, select any security-group which should allow (SSH and 8000 traffic).
24**.Create a Target group** (so that we can define which instances can be accessible) select VPC, Next> Select the Instances

25.Create a target group.
26.Add the Target group to the load-balancers.
27.Load-Balancer is created.

28.Wait for sometime, it will be active.
29.Now If we access the DNS Name url.
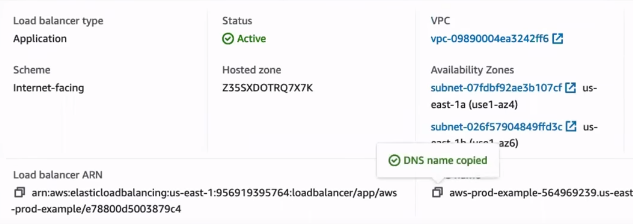
30.You should see this 🤗.

31.You deployed your first AWS Project🥳🥳.
Note: Don't forget to delete the resources whatever you created.
To Know more about this go, through the official documentation of AWS.
Credits: I followed this tutorial YT-Video to make this blog.
Pls follow Abhishek Veeramalla for more interesting topics in DevOps, his teaching is simply superb.
Thank you.


